


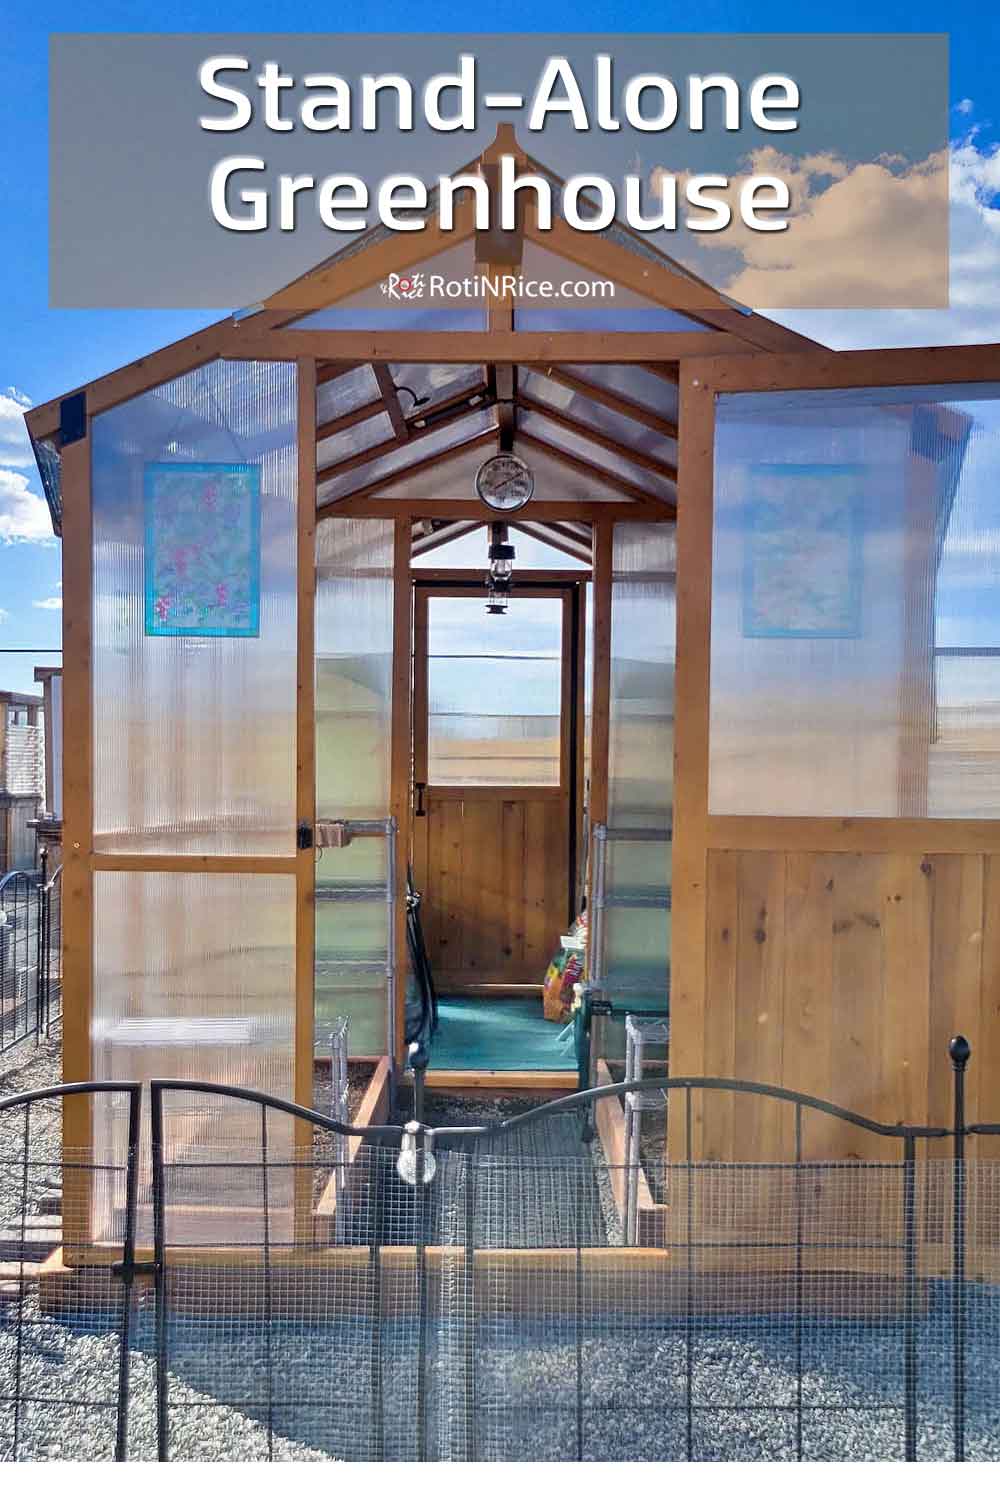

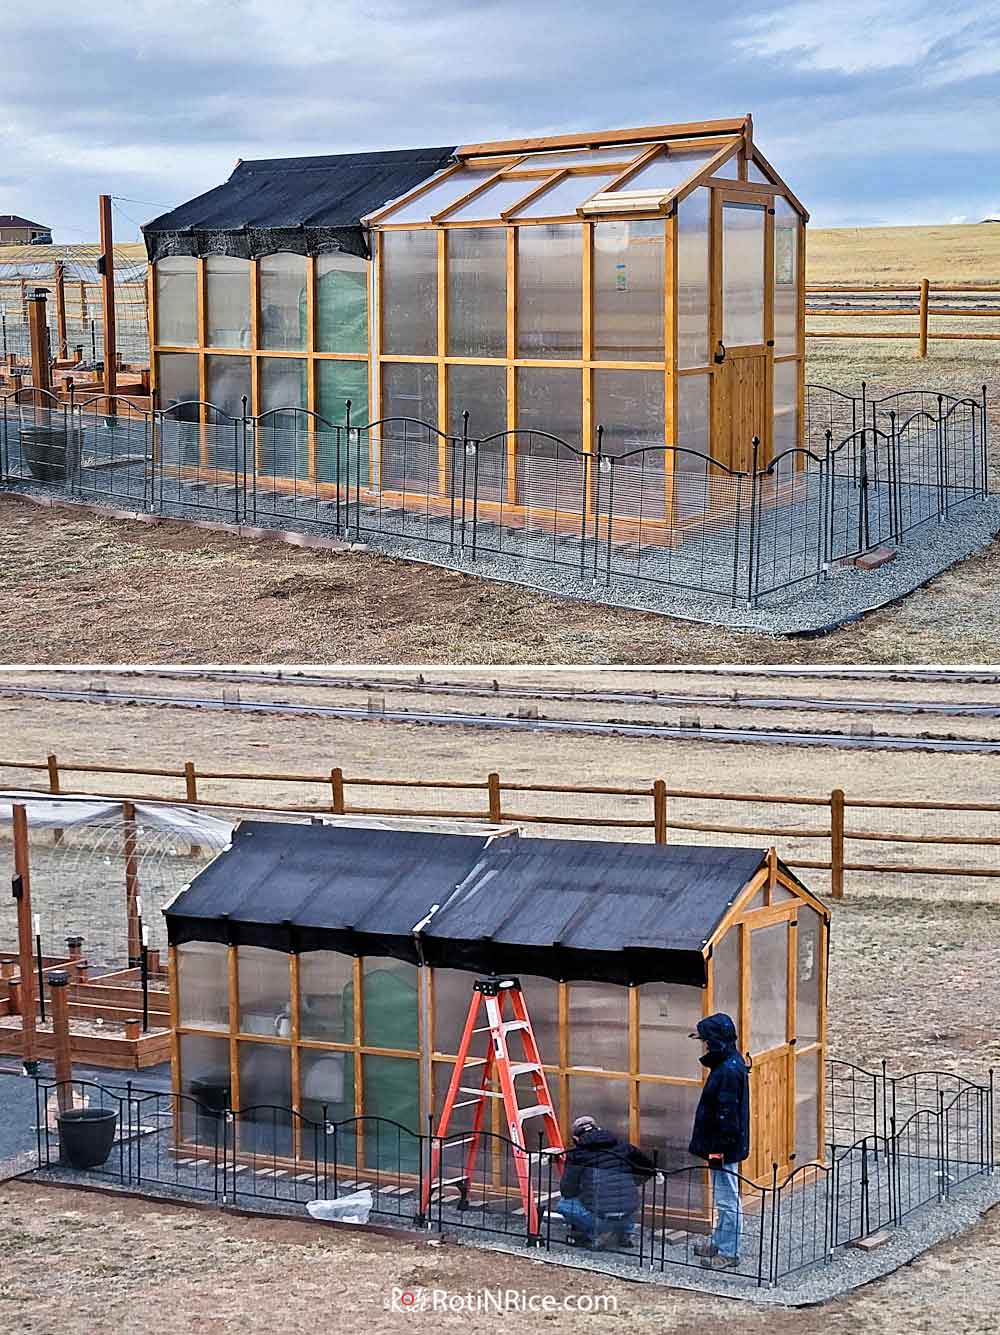
We built a Stand-Alone Greenhouse by the Raised Bed Garden to start seeds earlier in spring and continue growing vegetables later into fall.
In the summer of 2023, we decided to build a Stand-Alone Greenhouse close to our Raised Bed Garden. While I do start seeds in our sunroom, I thought it would be nice to be able to transfer the sprouted seeds to. It can get a little too crowded in the sunroom when the seedlings need to be up potted.
A Greenhouse Kit
We did not want to spend too much money on a second greenhouse, and so figured that we could order a kit online and installed it ourselves. After looking through many different kits, we settled on one with a wooden frame and polycarbonate glazing similar to this 6×8 FT Greenhouse Kit (affiliate link). Unfortunately the exact one that we ordered is no longer available.
Laying The Foundation
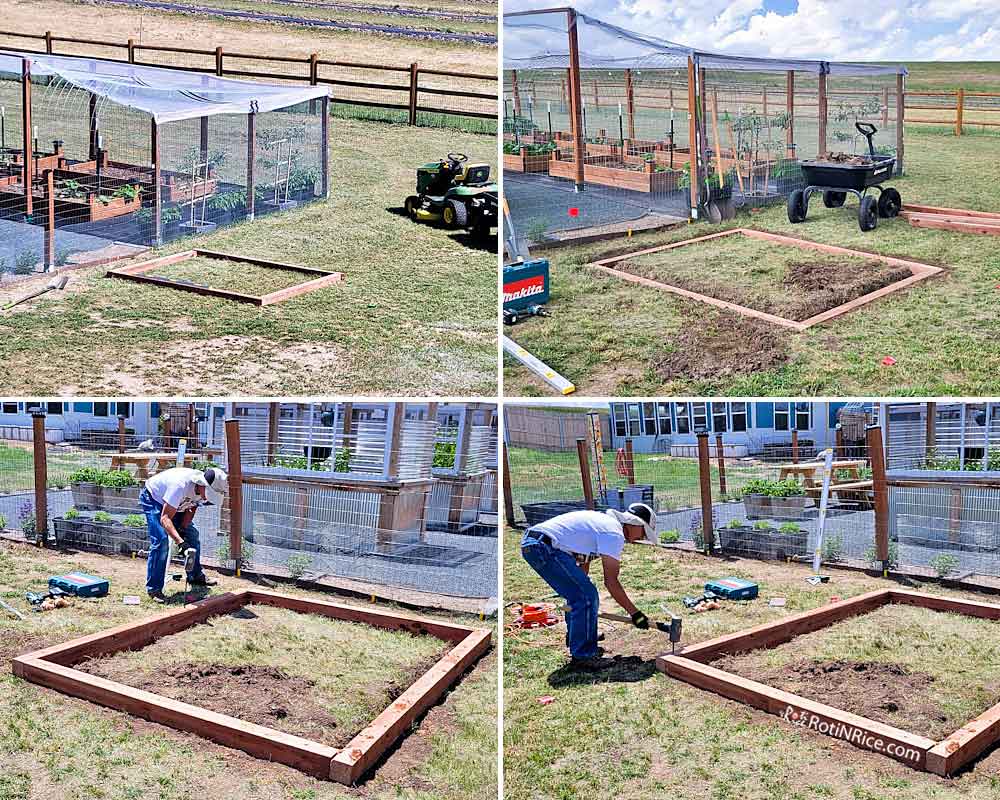
Our home near Cheyenne is very windy during the winter months. Wind speeds can get over 60 mph on stretches of days with no reprieve. It is cold and tiresome and not many people want to put up with it. Therefore, the foundation for the kit is very, very important.
We buried the first layer of 4″x4″ lumber frame into the ground to create a base the size of the greenhouse. The second frame above ground was anchored to the buried layer using 12 inch rebars.
Assembling And Anchoring The Stand-Alone Greenhouse
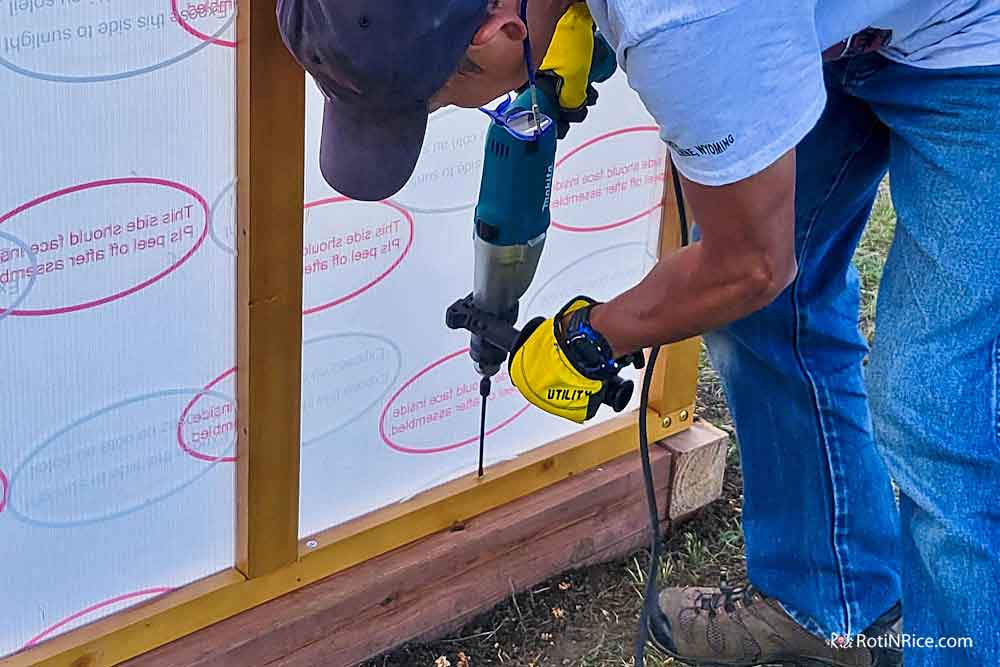
The partially assembled walls of the greenhouse are then placed on the 4″x4″ frame and screwed together using the screws provided.
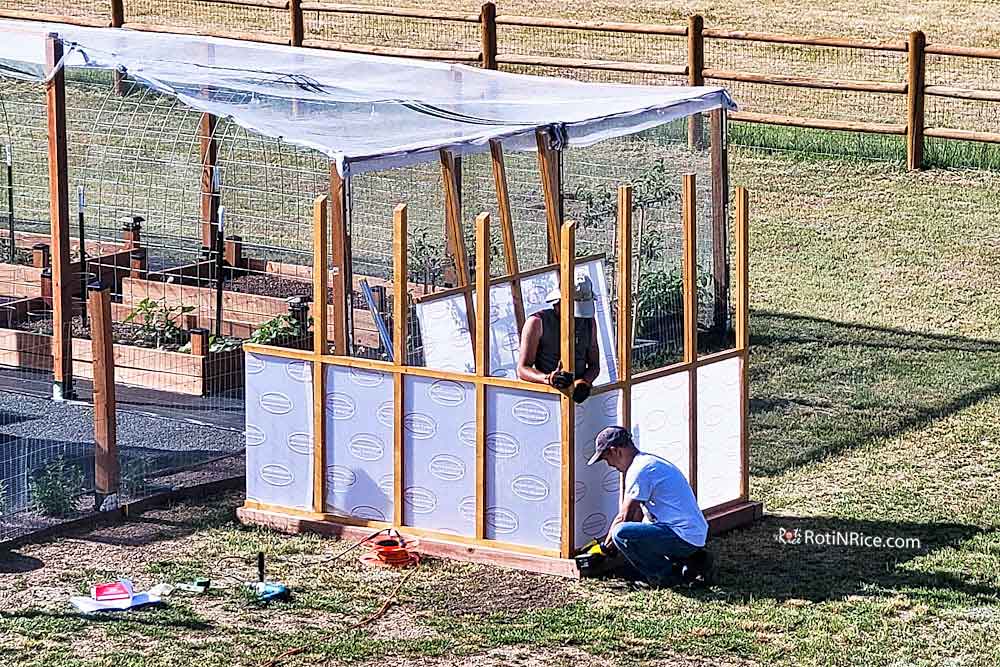
Then, base of the greenhouse was anchored to the 4″x4″ frame with heavy duty 8 inch wood screws.
Completing The Walls And Adding The Roof
Once the base of the greenhouse was anchored to the 4″x4″ frame, it was time to slide in the rest of the polycarbonate panels and install the roof. The roof was of course the hardest to install. If the walls are not properly squared, the roof will not fit. Thankfully, we have two engineers on the job and everything was nicely squared. The roof went up without issues.

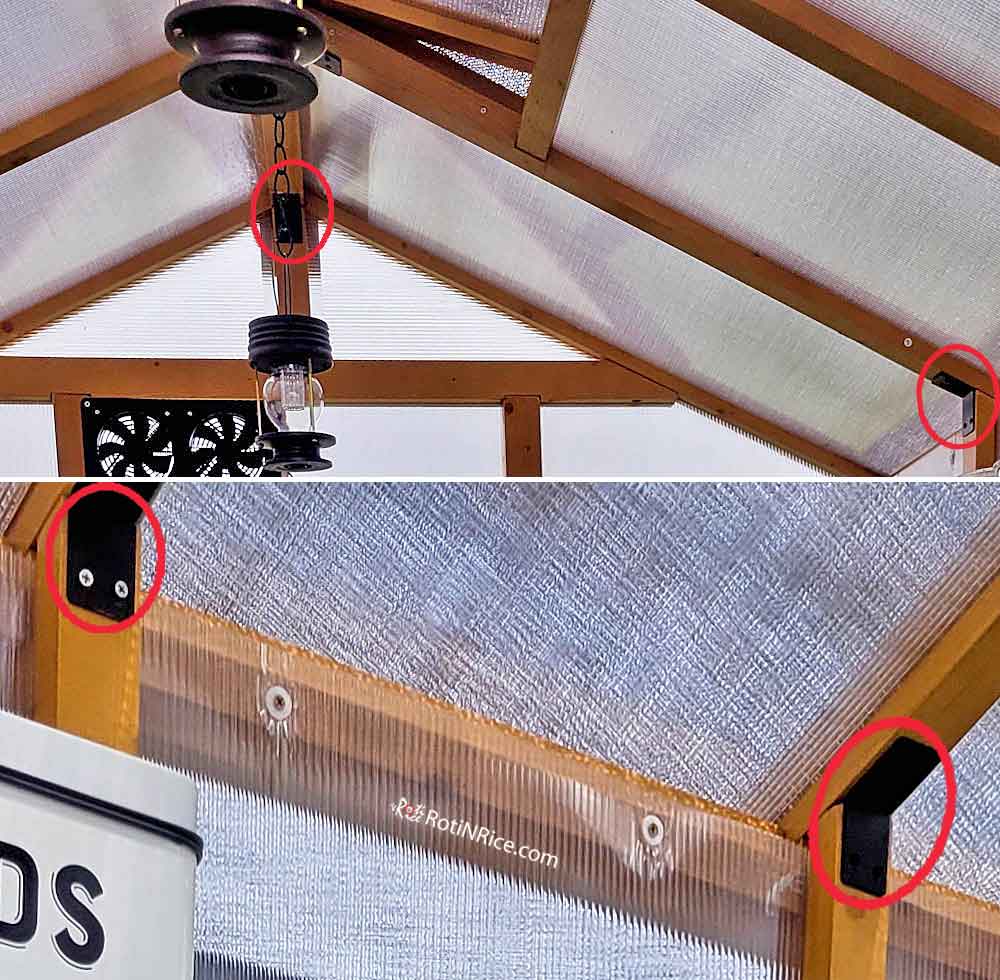
Wall and Roof Metal Brackets
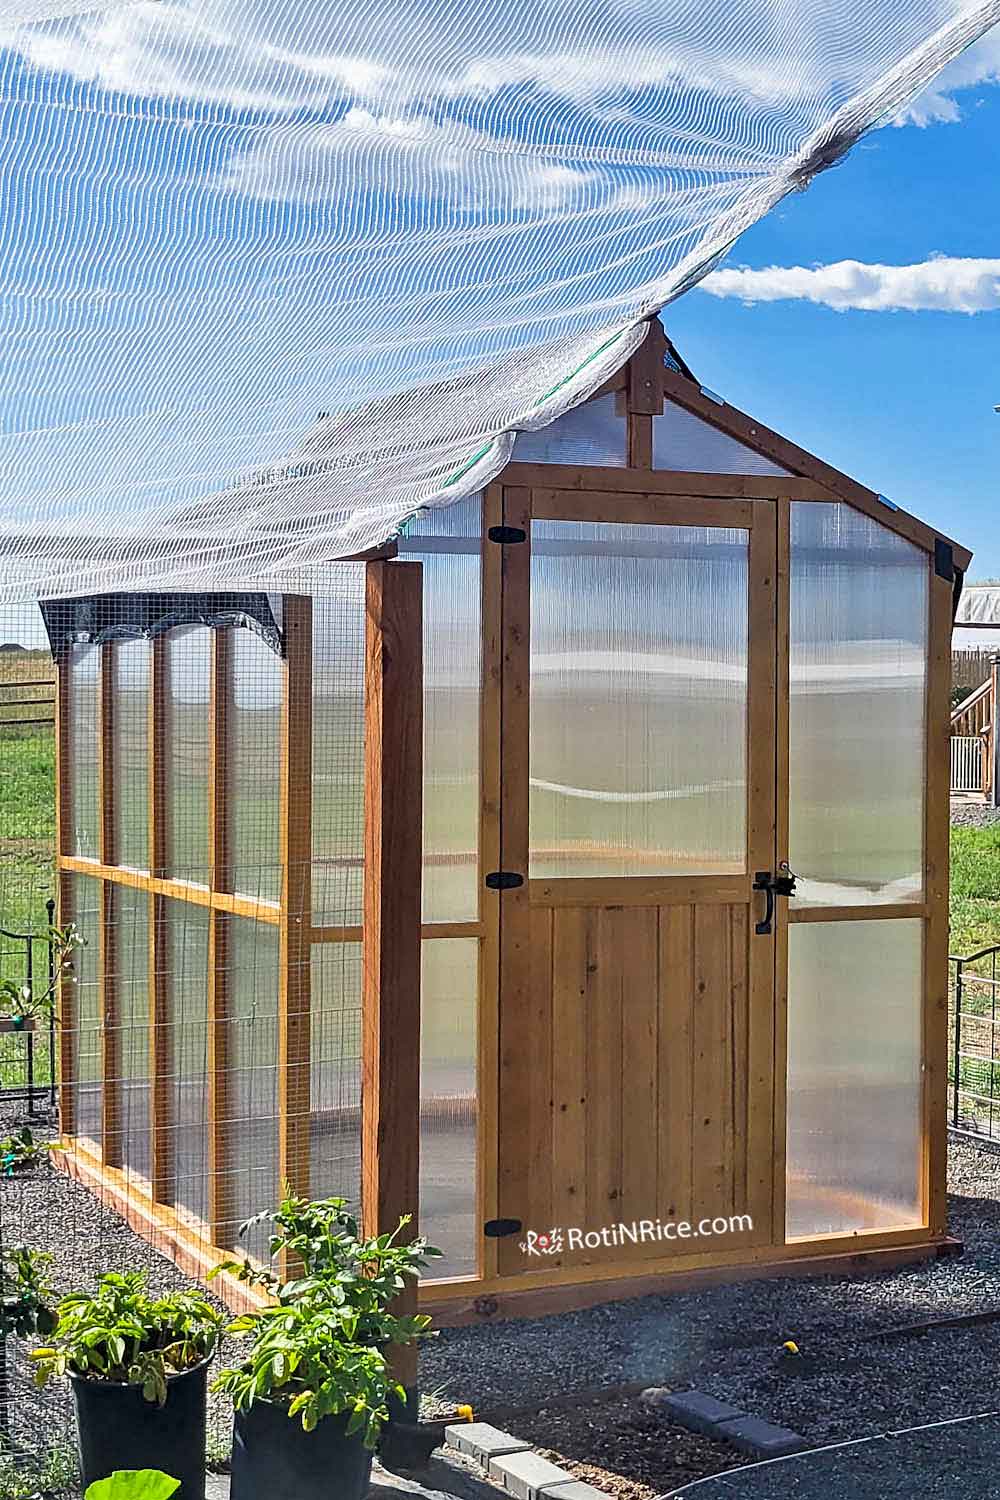
The good thing about this kit is that it came with metal brackets to attach on the inside to keep the entire structure more rigid and sturdy. This kit is only rated for 30 mph winds. The structure looks solid but the slide-in polycarbonate panels may be the weakest part. We will have to see if it can withstand the crazy Wyoming winds.
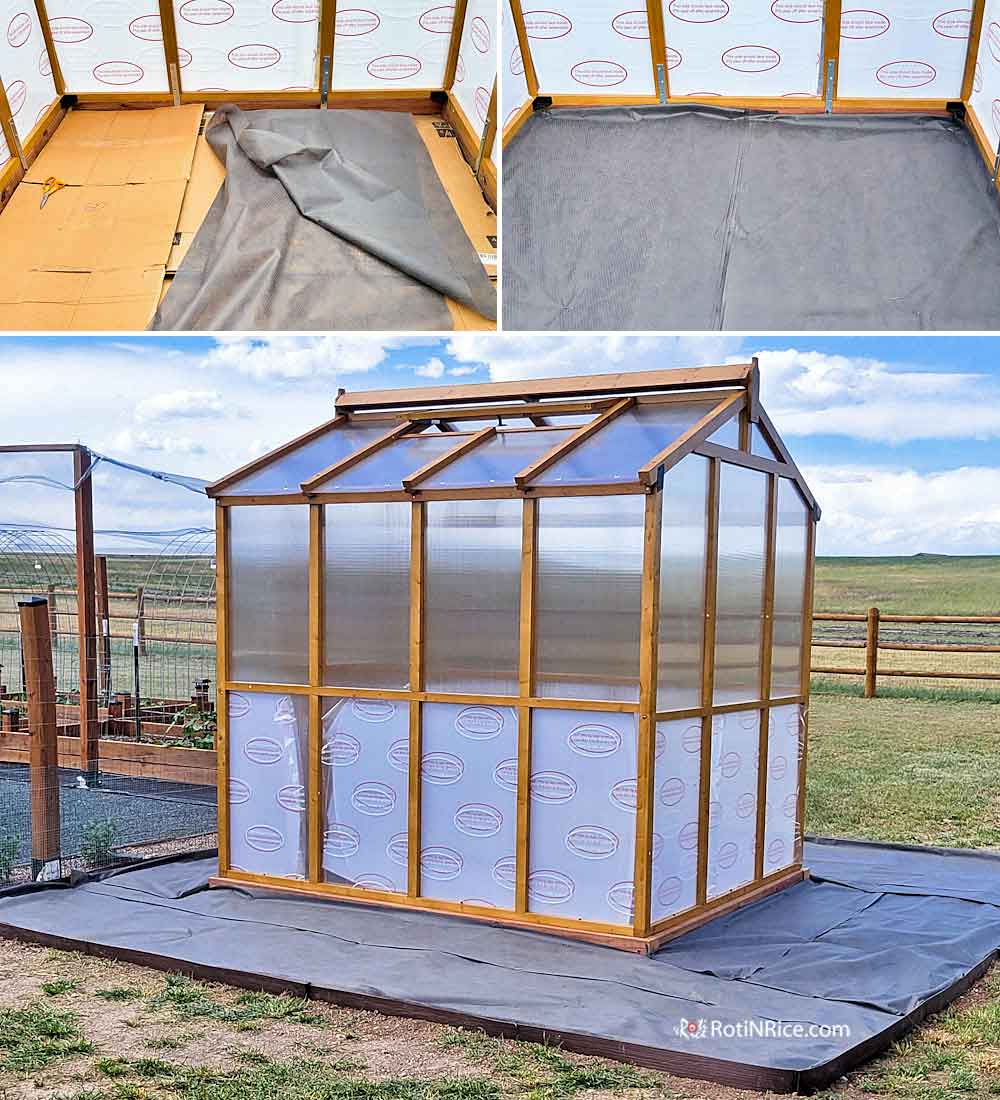
The Floor And Surrounding Area
Once the structure was completed, we had to take care of the floor. Instead of pavers like our main Greenhouse, I decided on spreading crushed granite (a.k.a. breezey) on bare dirt lined with ½ inch mesh, cardboard, and landscape fabric. The ½ inch mesh is to prevent critters from burrowing into the greenhouse. The cardboard and landscape fabric is to kill and prevent weeds in the bare soil underneath to grow.
Position Of The Stand-Alone Greenhouse
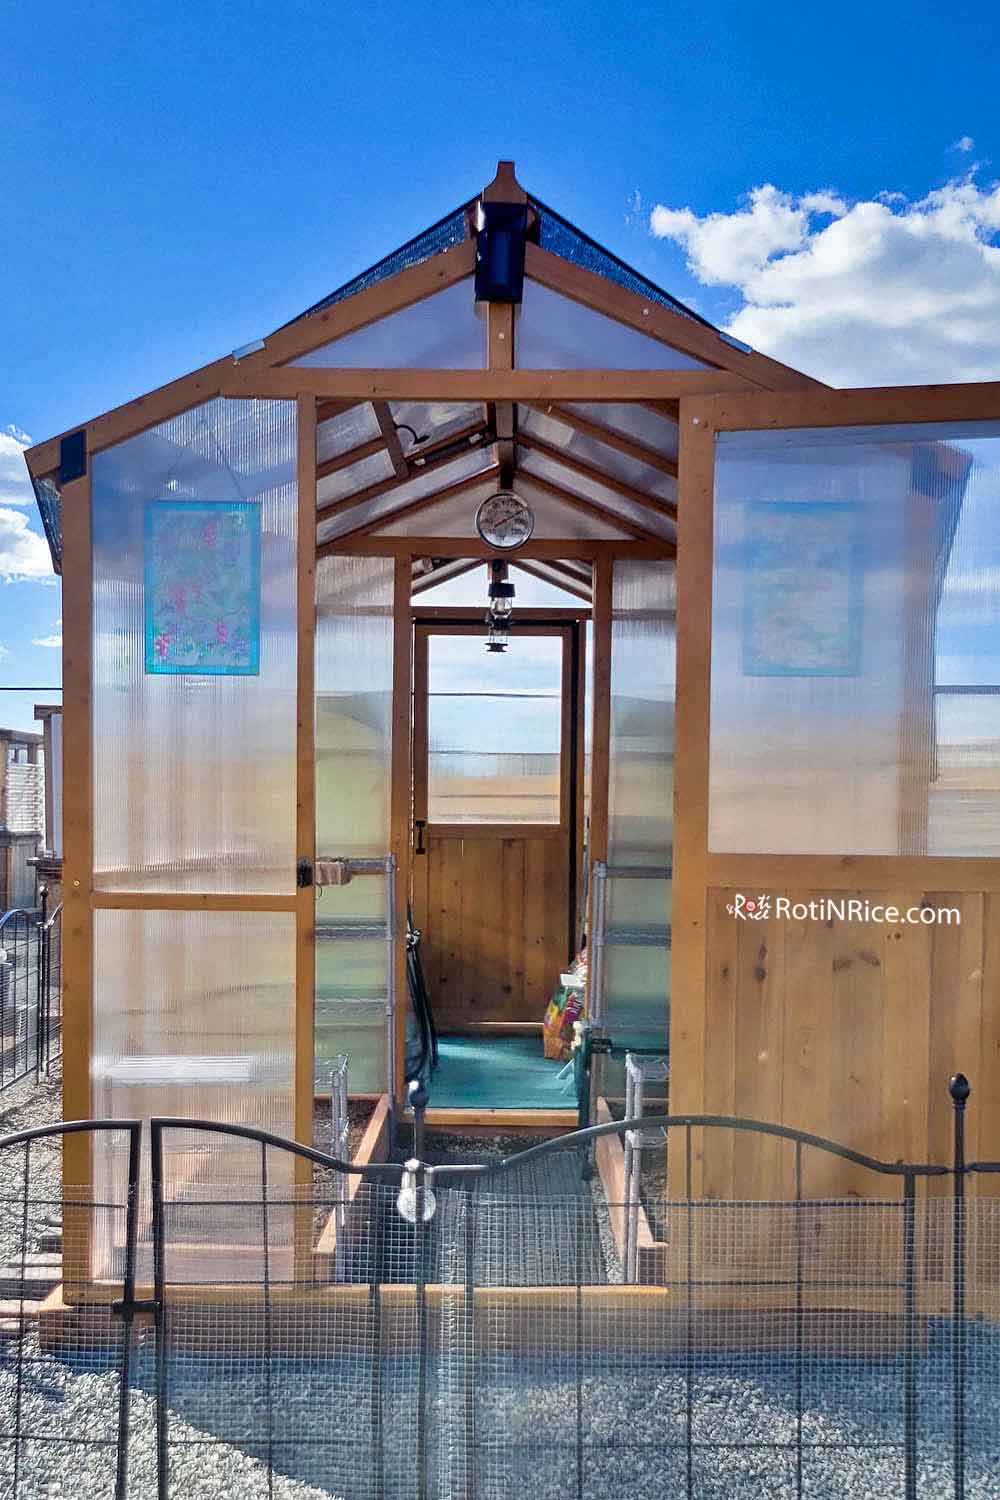
We also surrounded the greenhouse with a low fence and cut open the main fence for easy access into the Raised Bed Garden. To prevent the seedlings from burning because of the intense sun, we covered the top with a 40% shade cloth. Here, you can see the position of the Stand-Alone Greenhouse in relation to the Raised Bed Garden. The best part is that the seedlings in this greenhouse will be much closer to where they will eventually be transplanted into.

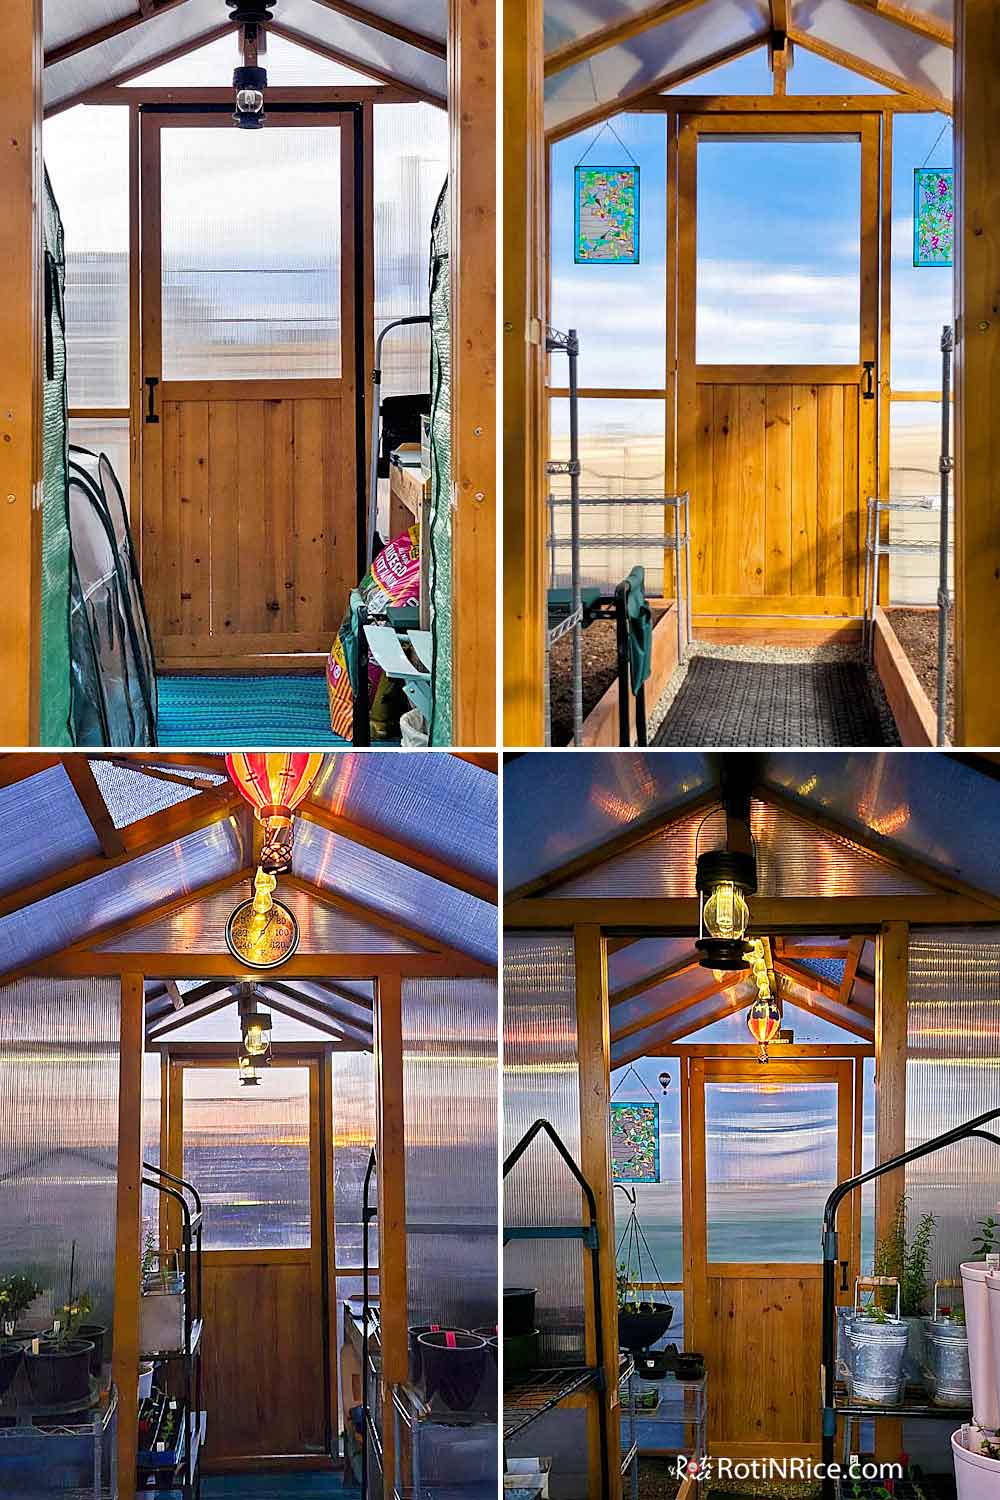
The Inside
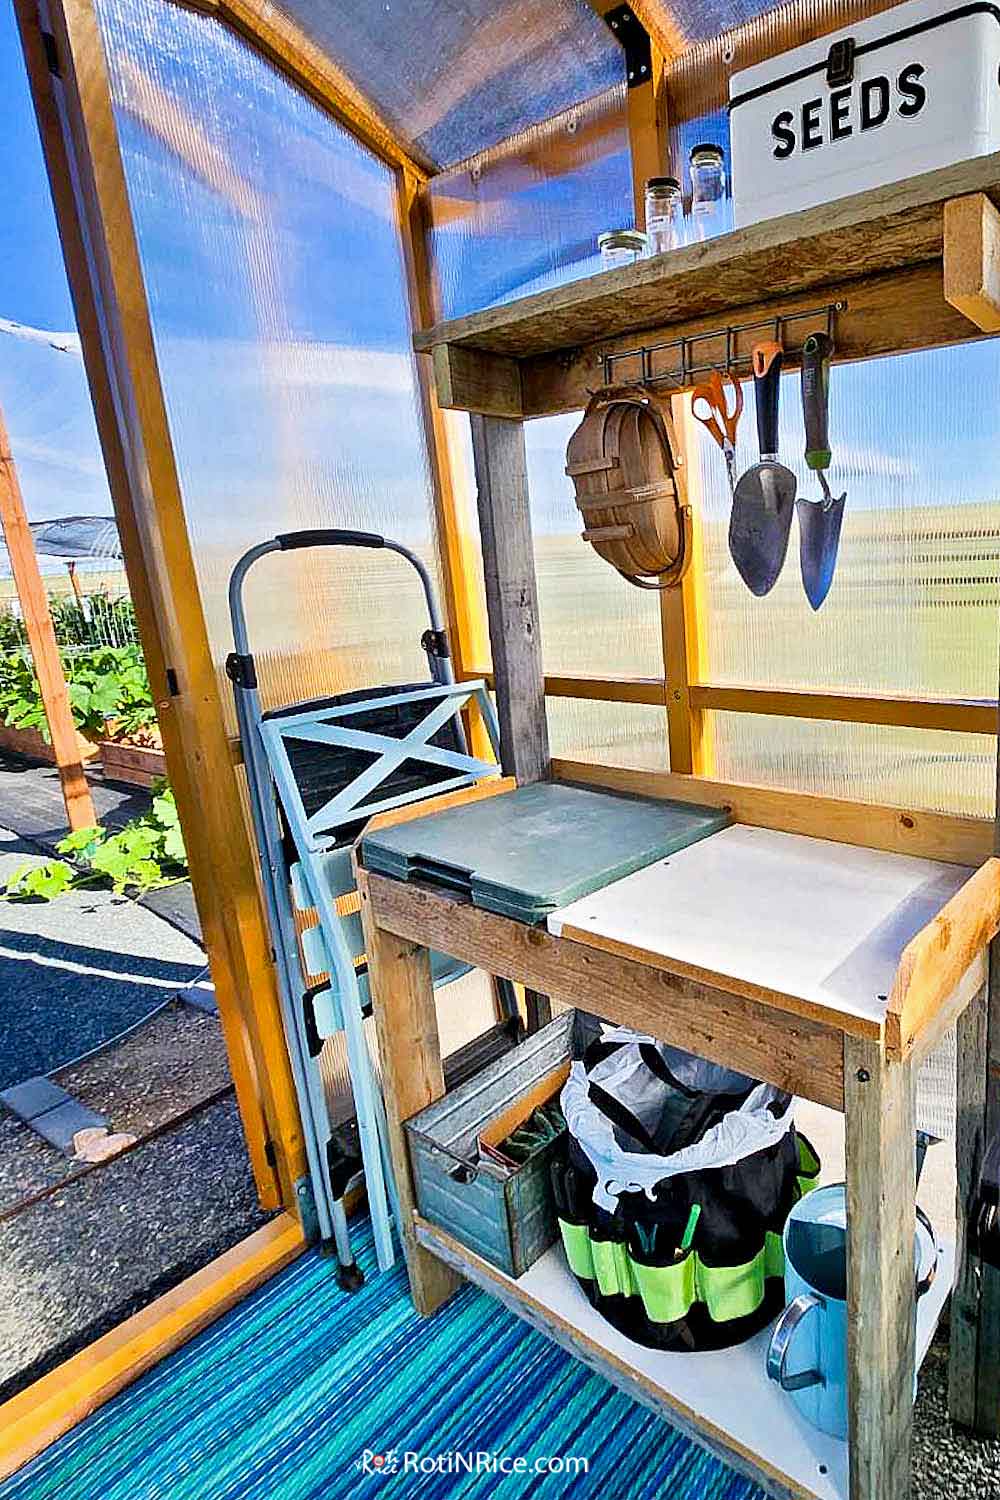
Rori-San made me a potting table from scraps of wood placed on one side and two layers of open shelves on the other side. 😍 I transferred the two mini portable greenhouses from the main greenhouse here for more shelving for my seed trays. I also placed an outdoor mat over the breezey floor for a cleaner look. Rori-San also installed solar lights and hung a some ornaments and a framed stained glass on the back wall to make it look pretty.🤩
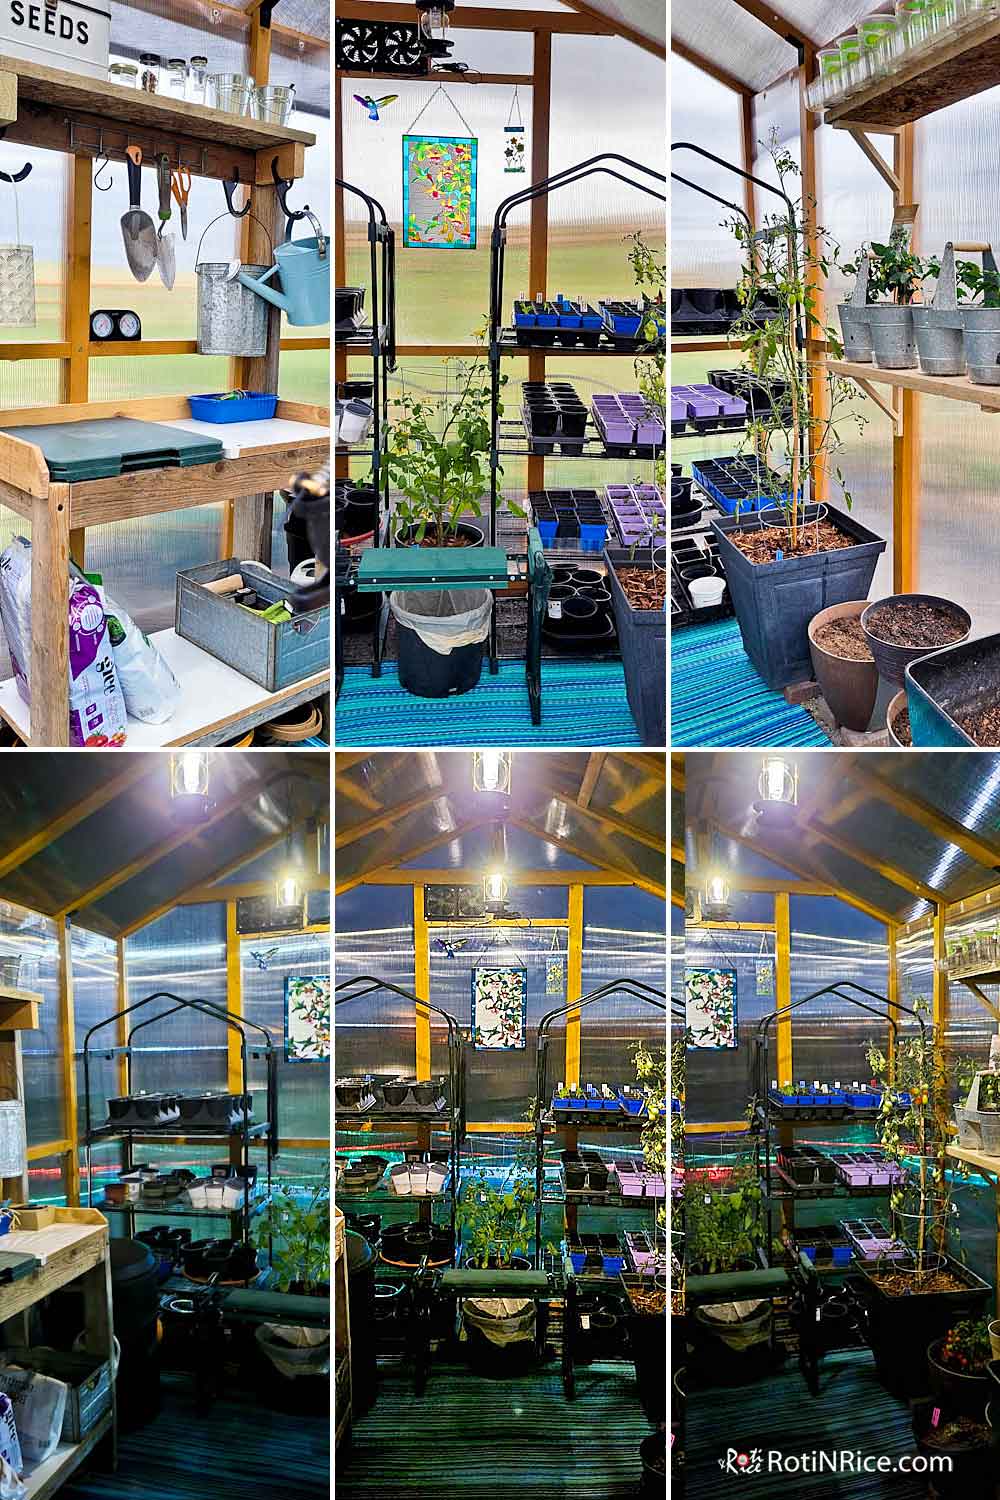
I really enjoy working inside this Stand-Alone Greenhouse with its close proximity to the rest of the vegetable garden. It is also a place for me to sit and rest during my time in the garden.
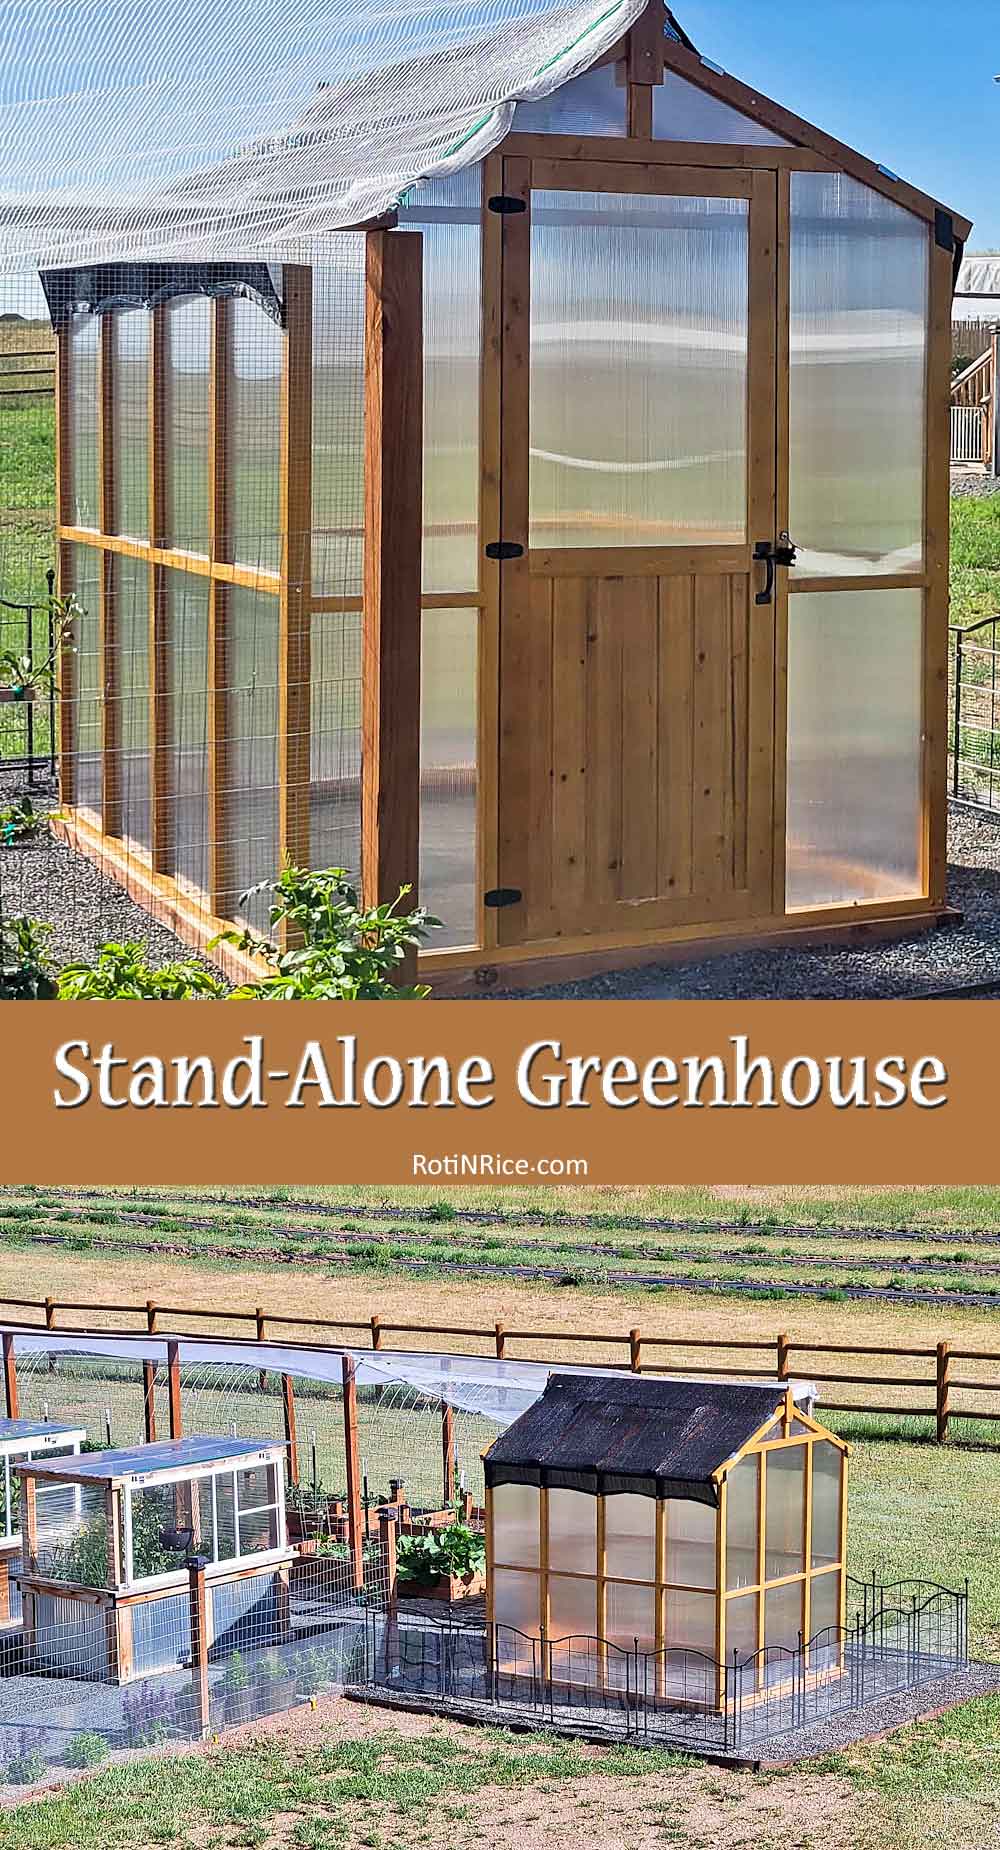
The Stand-Alone Greenhouse Extension
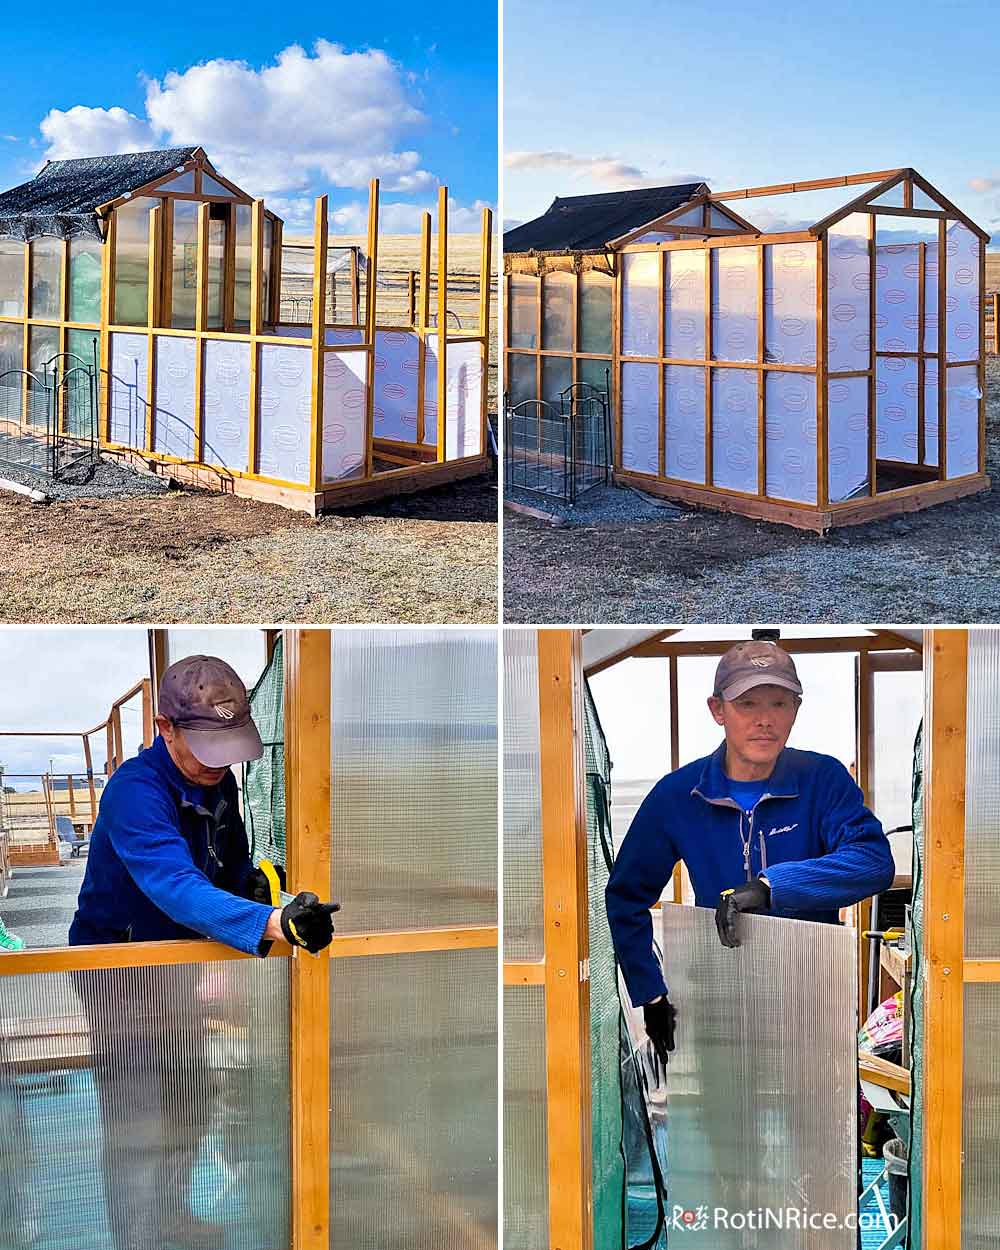
I guess it is not like us to leave things alone without improvements. 😂 In the spring of 2024, I requested for Rori-San to build me more Cold Frames so that I can grow leafy greens earlier in spring and later into fall. After much discussion, the guys thought it might be better for them to extend this greenhouse instead. We bought an identical kit to extend the size from a 6’x8′ structure to a 6’x16′ structure.

Here We Go Again!
Again, we started with the base, directly behind the original structure. The first frame is buried in the ground.

The second frame is anchored on the top of the first frame with 12 inch rebars.
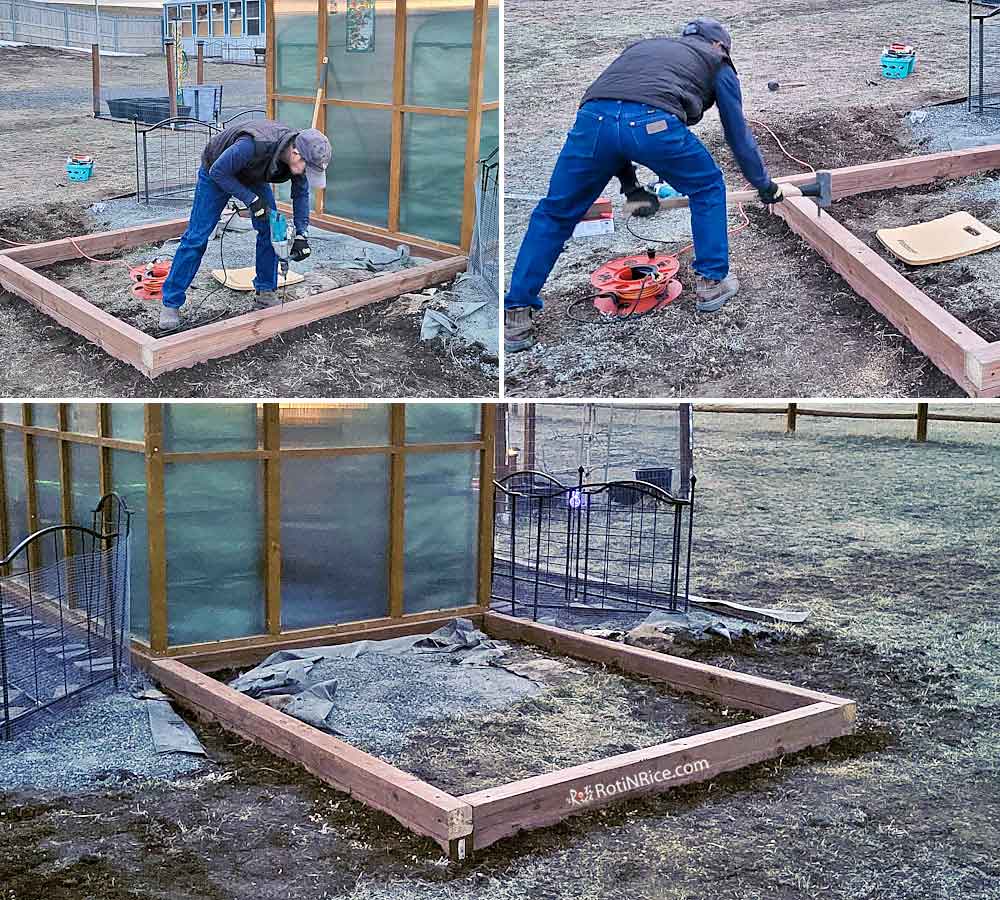
Installing the identical greenhouse back-to-back like before. Once the structure is up, the middle panels were cut and removed. The two greenhouses became one, with a door in front and at the back.
The Two Became One
We also extended the low fence to accommodate the longer structure. It was a lot of work but well worth the effort. 👍
Two Narrow Raised Beds
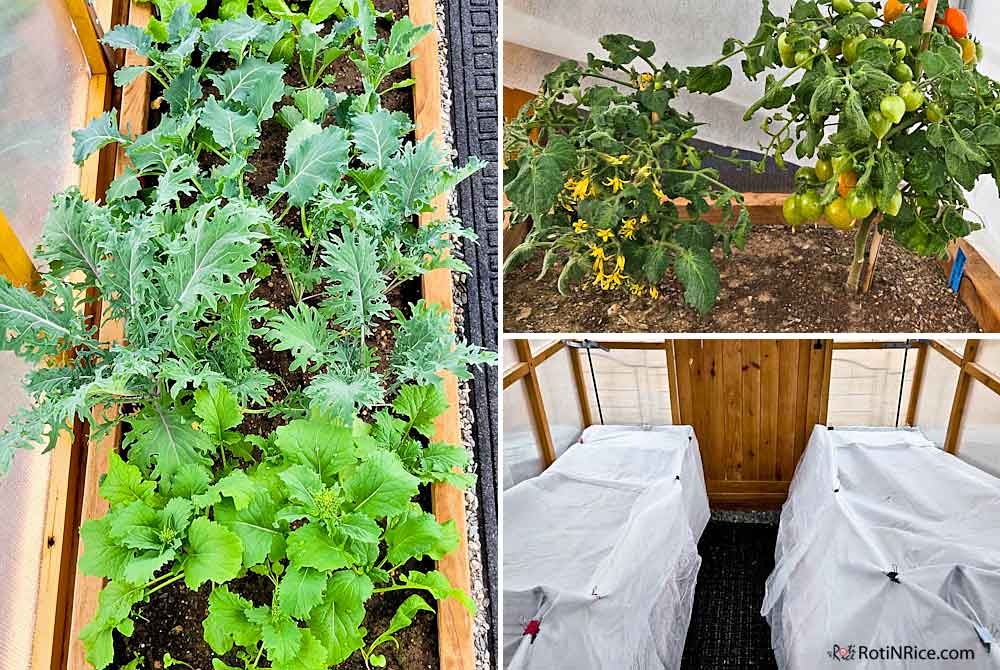
This time we added two narrow raised beds inside the extension, one on each side of the greenhouse. The raised beds are narrow at only 22 inches wide. It covers the entire length of the additional structure.
The two narrow raised beds are perfect for growing tender greens early in spring, micro tomatoes in the summer, and more greens later into the fall. I do cover the narrow beds in fall with frost cloth to protect the vegetables growing in them for as long as possible. There is no electricity in this greenhouse and so it is unheated in the winter months.
With a front and back door, this Stand-Alone Greenhouse has better ventilation in the summer, as both doors can be kept opened.
Similar Tools Used in This Stand-Alone Greenhouse Post
This post contains affiliate links. Please read my disclosure policy here.
Dewalt Atomic 20V MAX* Circular Saw, 4-1/2-Inch
Black & Decker Corded Drill, 5.5-Amp, 3/8-Inch
Makita XFD12Z 18V LXT Lithium-Ion Brushless Cordless 1/2″ Driver-Drill
6×8 FT Greenhouse Kit for Outdoor, 6MM Thick Polycarbonate Panel
6×8 FT Wood Green House, Polycarbonate Panel, Automatic Temperature Control Roof Vent
Heavy Duty Fir 6×8 FT Wooden Greenhouse, Polycarbonate Panels, Roof Vents


Leave a Reply